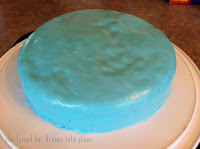
 I found the recipe over at snappee turtle. I only made half a batch of each color and that was plenty to cover the 9 inch double layer cake I made with some left over.
One thing to remember is that the fondant has to sit overnight in the fridge so make sure to mix it up the day before you want to decorate your cake.
Marshmallow Fondant Recipe
To make one batch of fondant you will need:
- 16 ounce bag of mini marshmallows
- 2-5 Tablespoons of water
- 2 pound bag of confectioner's powdered sugar
- Food coloring
- Crisco shortening (this is used to grease the counter and your hands to smooth the fondant)
 1. Pour all the mini marshmallows into a large glass bowl. I only used about half the bag since I was only making half a batch. Add 2-5 Tablespoons of water. (I put 2 Tablespoons). Microwave in 30 second increments for about 2 minutes or until the marshmallow is creamy with no lumps.
2. Add food coloring to the marshmallow and wait for it to cool off.
 3. Add the powdered sugar 1 cup at a time to the marshmallow, kneading it with your hands. Make sure to use shortening on your hands quite often, it is very sticky.
4. Wrap the fondant in plastic wrap and place in zip lock bags. Refrigerate until you are ready to use. It should be allowed to settle overnight.
 Make your cake as normal and frost it with regular frosting. This makes the fondant stick to the cake better. Take your fondant out of the refrigerator and get ready to roll it out. You can get a fondant rolling mat with circle measurements on it to show you how big it should be to cover your cake, but I just rolled it out on wax paper.
 I had a 9 inch cake and I made sure the circle I rolled out was at least 12 inches across. It ended up a little bigger than that and as you can see I had plenty to cover the cake. Carefully peel the fondant and place over the cake. This was tricky for me, it kept wanting to stretch too much. Use a pizza cutter to cut the excess fondant off the edges.
I rolled out the second color and used cookie cutters to cut out shapes. I think it turned out fairly well and I learned a few tips for next time when I make the actual birthday cake. Now we have a yummy strawberry cake to eat this week!
(linking up here, here, here and here)


